Kaisercraft Memo Board- SB2037
Pink Paislee Secret Crush 'Love Notes' paper
Pink Paislee Secret Crush Paper Goods
Kaisercraft Champagne Rhinestones
Graphic 45 Ornate Metal Keys
paint brush
foam paint brush
Tombo Liquid Glue
hammer
pliers
Xacto Knife
scissors
pencil
black acrylic paint
Beacon's 3 In 1 Glue
Step 1. Take out all of the pieces to your memo board, your black paint, and paintbrushes. You need to paint the edges and flourishes on the back of the board, paint the edges of both the smaller strips, and paint the backs and fronts of both smaller pieces as well. Allow all of these pieces to dry before you proceed.
Step 2: Next, you will need to get out your sheet of Pink Paislee paper. Set the back piece of the memo board on top of this piece and line up the bottom of the paper with the bottom edge of the board, not the flourishes though. Trace around the edge of the board and then cut out the paper. Adhere the paper to the board using the Tombo Liquid Glue. Remember, with this glue you need to smooth it out well and that less is more. You don't need to be heavy handed with this glue for the paper to stick to the board. Do any trimming you need to with either your scissors or Xacto knife. Make sure to trim out the holes in this board as well so that the slots for the little shelf will slide in. Once covered, the board will look like the picture below.
For the bottom hooks, measure up 5/8" from the board and make several dots. Connect these dots with a faint pencil line. This will give you a guide where to put the hooks in at. For the hooks, you will need to evenly space them out along the pencil line. You can either do this free form or measure the board and evenly space the hooks. The hooks will screw into the board. To start these hooks into the board though, you will need to lightly hit them with a hammer. If the hooks bend a little as you hit them, don't worry because you can straighten them out with your pliers. Once the hooks are all the way in, they may also go all the way through to the back of the board and stick out a little. This is okay since the back will be against the wall. If you don't want them to stick out on the back at all, just unscrew the hooks a tad.
For the top hooks, set the memo pad on the board where you want it to hang. Use the pencil and make dots where the holes of the memo pad is. This will give you a guide for these two hooks. Once all the hooks are in it will look like the photo above.
Step 4: We will now put the little shelf onto the board. Find the piece that doesn't have the scalloped edge and push the slotted edge into the holes on the back board. Once this piece is secure, push the slotted edge of the scalloped edge piece into the holes of the previous piece. This will create a cute shelf to hold pens on. You may also need to touch up the paint on the shelf, so do this now if you want and allow to dry. Slip your memo pad onto the board as well. Check out the photo to the left if you need help.
Step 5:
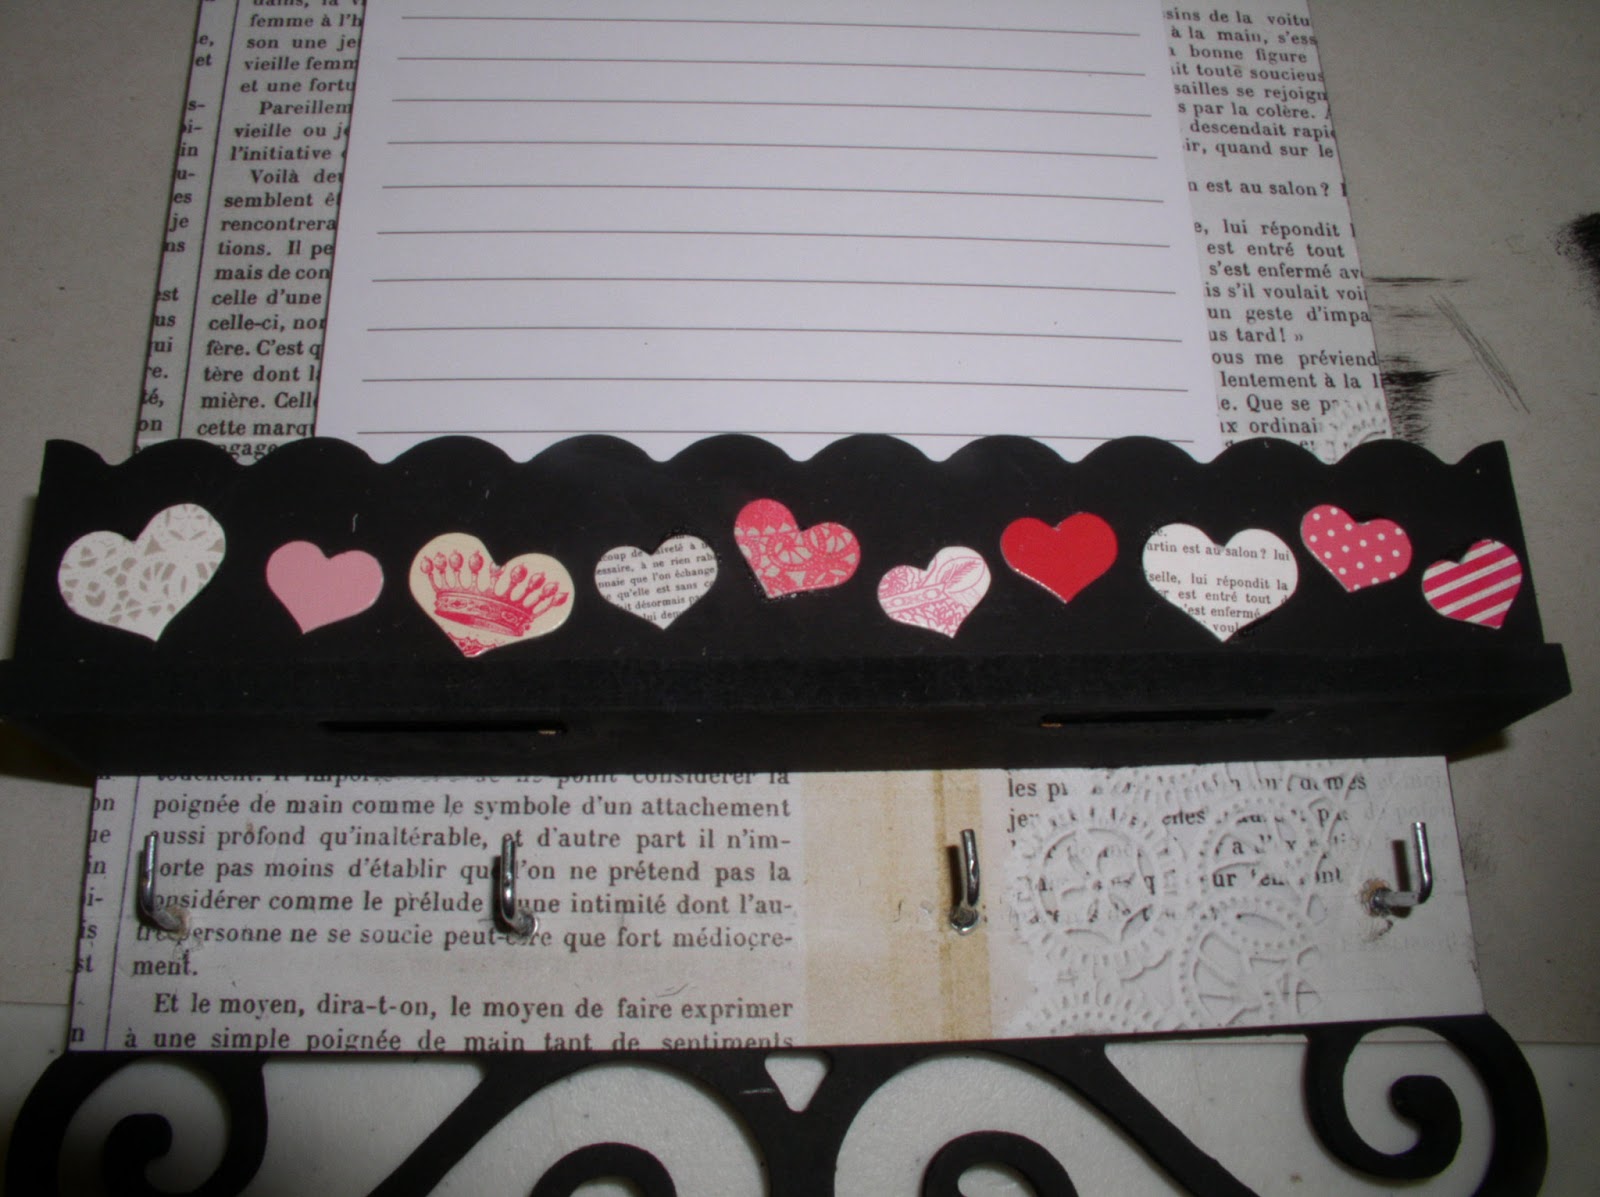
1. Take out your package of the Pink Paislee Secret Crush Paper Goods. Find ten small hearts in this pack and glue them along the front of the scalloped piece on the shelf. I adhered these hearts using the Tombo Liquid Glue. The photo at the right will help you with this step if you need a guide.
Step 6: Pick out five of your favorite tickets from your Paper Good pack. Adhere them along the top of the board at fun angles, overlapping one another. There are lots of fun tickets in this pack, so choose the ones that are most to your taste. Check out the photo to the left to see what I chose.
Step 7: Find your package of the Graphic 45 Ornate Metal Keys. Choose three keys out of this pack and adhere them randomly along the top of the board. The keys will overlap the tickets. Check out the placement of my keys in the picture to the right. I adhered my keys on using Beacon's 3 In 1 Glue.
Step 8: Find your package of Kaisercraft Champagne Rhinestones. You will stick five of the largest rhinestones to the swirls on the bottom of the board. Stick three of the largest rhinestones to the swirls on the top of the board. You will also stick one of the medium rhinestones to each of the scallops on the front of the scalloped shelf piece. You can see where to place the rhinestones in the picture above and the pictures to the left. This is your last step. Yea!!
The photo above is the board all finished up. Feel free to change it up however you like or add other things to your board. Remember, there is no wrong way to do papercrafting!! Thanks for stopping by.


No comments:
Post a Comment